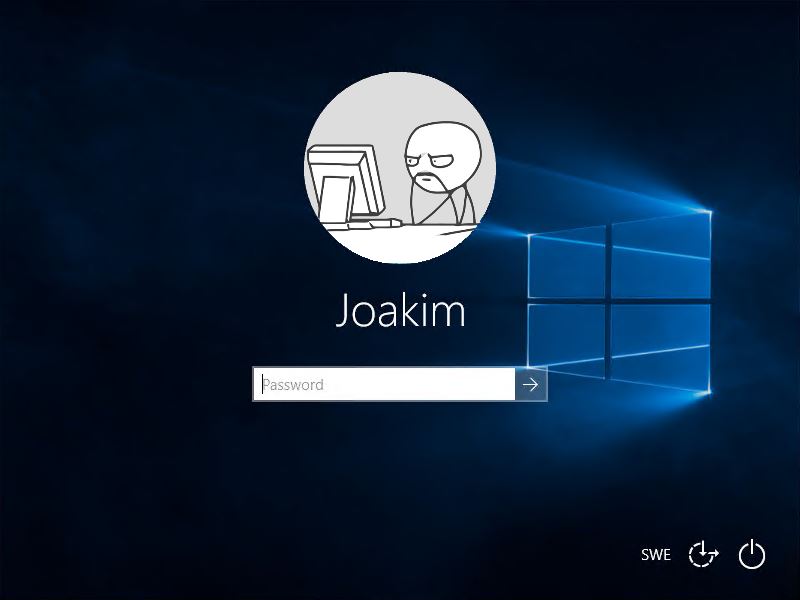
I’ve been working on implementing Windows 10 at a company.
They wanted to import a photo of all the users to the Active Directory, and have all the other systems pull the pictures from it. I primarily focused on Windows clients, Lync and SharePoint.
Goal
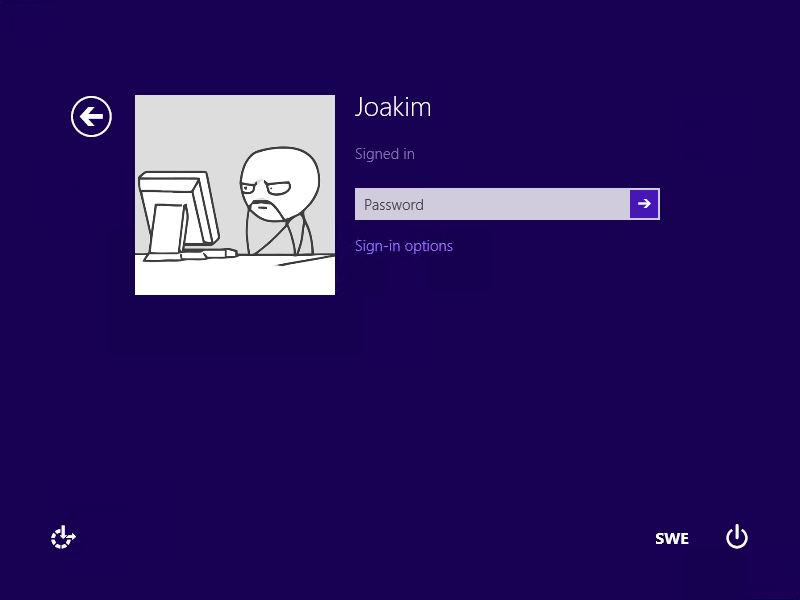
Our goal is to have Windows 8 and 10 clients pull the pictures from Active Directory to the users local profiles.
1. Importing the pictures to Active Directory
Now there are several approaches for this. Getting the pictures into AD I prefer using PowerShell.
If you’re more into GUI style I can recommend this AD Photo Edit.
2. Create the required scripts
You need a (startup) script to download the data from Active Directory and convert them to JPEG-files.
The script then proceeds to set these images as your local users profile picture/tile.
The PowerShell-script I’m using was originally written by Jordan. I modified it for better functionality and to make it work better with Windows 10.
<#
.SYNOPSIS
Set-ADPicture.ps1
Written by Joakim at Jocha AB, http://jocha.se
.DESCRIPTION
Version 1.3 - Updated 2016-02-13
This script downloads and sets the Active Directory profile photograph and sets it as your profile picture in Windows.
Remember to create a defaultuser.jpg in \\domain\netlogon\

2016-02-13 : Slightly adjusted.
2015-11-12 : Added all picture sizes for Windows 10 compatibility.
#>

[CmdletBinding(SupportsShouldProcess=$true)]Param()
function Test-Null($InputObject) { return !([bool]$InputObject) }

# Get sid and photo for current user
$user = ([ADSISearcher]"(&(objectCategory=User)(SAMAccountName=$env:username))").FindOne().Properties
$user_photo = $user.thumbnailphoto
$user_sid = [System.Security.Principal.WindowsIdentity]::GetCurrent().User.Value

# Continue if an image was returned
If ((Test-Null $user_photo) -eq $false) {
    Write-Verbose "Photo exists in Active Directory."
}
# If no image was found in profile, use one from network share.
Else {
    Write-Verbose "No photo found in Active Directory for $env:username, using the default image instead"
    $user_photo = [byte[]](Get-Content "\\$env:USERDNSDOMAIN\NETLOGON\defaultuser.jpg" -Encoding byte)
}

# Set up image sizes and base path
$image_sizes = @(32, 40, 48, 96, 192, 200, 240, 448)
$image_mask = "Image{0}.jpg"
$image_base = "C:\ProgramData\AccountPictures"

# Set up registry
$reg_base = "HKLM:\SOFTWARE\Microsoft\Windows\CurrentVersion\AccountPicture\Users\{0}"
$reg_key = [string]::format($reg_base, $user_sid)
$reg_value_mask = "Image{0}"
If ((Test-Path -Path $reg_key) -eq $false) { New-Item -Path $reg_key }

# Save images, set reg keys
Try {
    ForEach ($size in $image_sizes) {
        # Create hidden directory, if it doesn't exist
        $dir = $image_base + "\" + $user_sid
        If ((Test-Path -Path $dir) -eq $false) { $(mkdir $dir).Attributes = "Hidden" }

        # Save photo to disk, overwrite existing files
        $file_name = ([string]::format($image_mask, $size))
        $path = $dir + "\" + $file_name
        Write-Verbose "  saving: $file_name"
        $user_photo | Set-Content -Path $path -Encoding Byte -Force

        # Save the path in registry, overwrite existing entries
        $name = [string]::format($reg_value_mask, $size)
        $value = New-ItemProperty -Path $reg_key -Name $name -Value $path -Force
    }
}
Catch {
    Write-Error "Cannot update profile picture for $env:username."
    Write-Error "Check prompt elevation and permissions to files/registry."
}
To make this script run hidden I resolved to creating a VBs wrapper that would silently execute the script
'
' Title:  Set-ADPicture.vbs
' Author: Joakim at Jocha AB, http://jocha.se
' Modified: 2016-02-13
'
On Error Resume Next
command = "powershell.exe -Noninteractive -ExecutionPolicy Bypass -Noprofile -File \\domain.local\NETLOGON\Set-ADPicture.ps1"
set shell = CreateObject("WScript.Shell")
shell.Run command,0
Now put both these scripts in your NETLOGON-folder (ie. \\domain.local\NETLOGON).
3. Setting up the GPO
Open the Group Policy Management Console and create a new GPO. Lets call it “Pictures”.
Edit it and go to
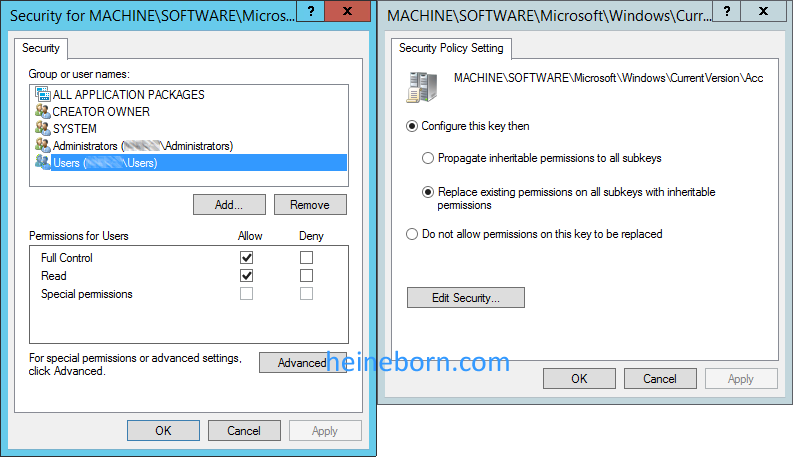
Computer Configuration > Policies > Windows Settings > Security Settings > Registry
Right Click on Registry and select Add Key. Then Add the Key:
MACHINE\SOFTWARE\Microsoft\Windows\CurrentVersion\AccountPicture\Users
Give Full Permission on this key (and sub keys) to <Domain>\Users.
Also make sure you have selected Replace Existing permission on all sub keys with inheritable permissions. Otherwise the script will not be able to update the necessary registry values.
4. Setting up the Task schedule
To run the function there are a couple of different approaches. You could either execute it from the “Logon Scripts” function in a Group policy or via Task Scheduler for example. Since you probably know how to set up a logon script, I’ll demo how to set up a scheduled job…
In the same Group Policy object as above, go to:
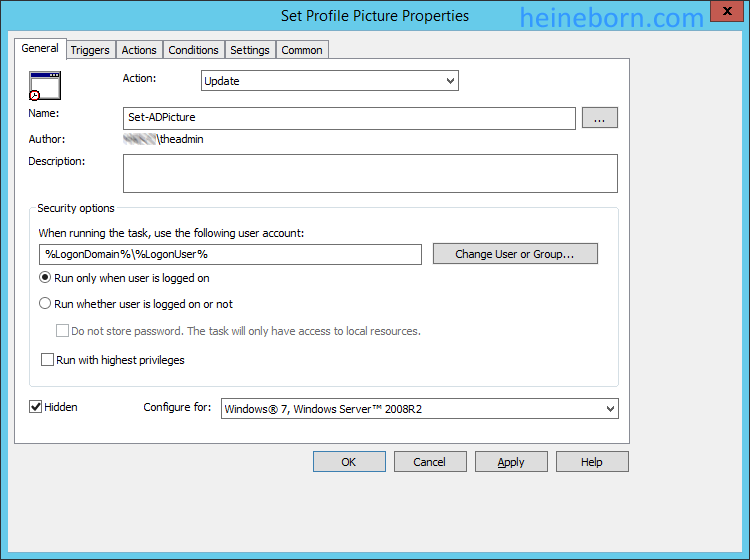
User Configuration > Preferences > Control Panel Settings > Scheduled Tasks
Right Click and select New Sheduled Task (At lest Windows 7) option.
Under the General tab Set Name as: Set-ADPicture
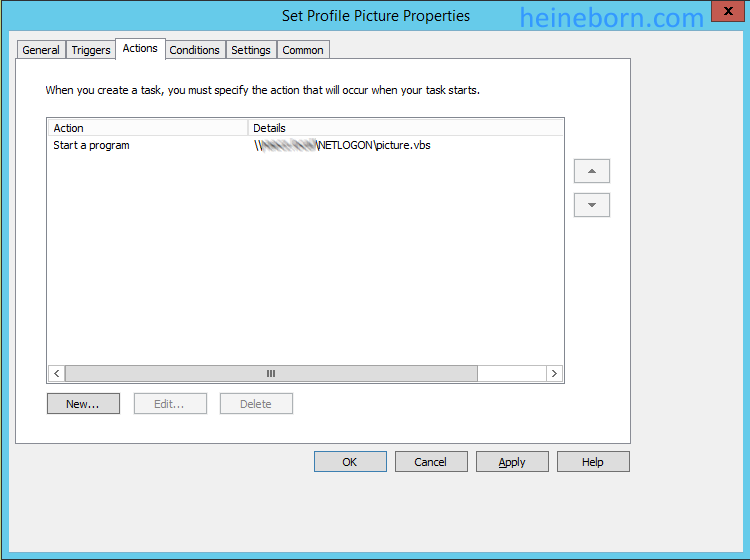
Under the Actions tab:
Create New Action Select Action “Start Program”.
From Program Script Option.
Select the VBs-script from NETLOGON.
5. Target the GPO
All the settings are now set. Go back to the Group Policy console and create your target links to the proper OUs.
Please let me know if I’ve missed something or if its not working for you.



Hi Joakim,
many thanks for this script.
Can you explain, what in the script has to change, if I would like to
have some login to c:\temp for example? Only for diagnostic.
Regards
Daniel
Hi Daniel,
What do you mean? That you would like to import pictures from C: instead of the user folder, or that you want to download the pictures from Active Directory to C:?
If the latter try adjusting the "$image_base" variable.
Best regards.
Hi,
Thank you a lot for sharing your script, it works great.
I had to slightly change the script for the variable that is used where the images shoud be stored, ConfigMgr does not allow to write to the cache.
I also restricted the Registry access more than in your example.
You can follow to my blog by using the website URL.
Modified to work with Windows 10, build 1607, and to work with local accounts. Also added a function written by Michal Gajda of http://commandlinegeeks.com to properly size images.
<#
.SYNOPSIS
Set-ADPicture.ps1
Written by Joakim at Jocha AB, http://jocha.se
.DESCRIPTION
Version 1.3 – Updated 2016-02-13
This script downloads and sets the Active Directory profile photograph and sets it as your profile picture in Windows.
Remember to create a defaultuser.jpg in \\domain\netlogon\
2016-09-30 : Updated to change image size, and to work with Windows 10 1607, and to work with local accounts. -Jesse Paxson
2016-02-13 : Slightly adjusted.
2015-11-12 : Added all picture sizes for Windows 10 compatibility.
#>
[CmdletBinding(SupportsShouldProcess=$true)]Param()
function Test-Null($InputObject) { return !([bool]$InputObject) }
Function Set-ImageSize
{
<#
.SYNOPSIS
Resize image file.
.DESCRIPTION
The Set-ImageSize cmdlet to set new size of image file.
.PARAMETER Image
Specifies an image file.
.PARAMETER Destination
Specifies a destination of resized file. Default is current location (Get-Location).
.PARAMETER WidthPx
Specifies a width of image in px.
.PARAMETER HeightPx
Specifies a height of image in px.
.PARAMETER DPIWidth
Specifies a vertical resolution.
.PARAMETER DPIHeight
Specifies a horizontal resolution.
.PARAMETER Overwrite
Specifies a destination exist then overwrite it without prompt.
.PARAMETER FixedSize
Set fixed size and do not try to scale the aspect ratio.
.PARAMETER RemoveSource
Remove source file after conversion.
.EXAMPLE
PS C:\> Get-ChildItem 'P:\test\*.jpg' | Set-ImageSize -Destination "p:\test2" -WidthPx 300 -HeightPx 375 -Verbose
VERBOSE: Image 'P:\test\00001.jpg' was resize from 236x295 to 300x375 and save in 'p:\test2\00001.jpg'
VERBOSE: Image 'P:\test\00002.jpg' was resize from 236x295 to 300x375 and save in 'p:\test2\00002.jpg'
VERBOSE: Image 'P:\test\00003.jpg' was resize from 236x295 to 300x375 and save in 'p:\test2\00003.jpg'
.NOTES
Author: Michal Gajda
Blog : http://commandlinegeeks.com/
#>
[CmdletBinding(
SupportsShouldProcess=$True,
ConfirmImpact="Low"
)]
Param
(
[parameter(Mandatory=$true,
ValueFromPipeline=$true,
ValueFromPipelineByPropertyName=$true)]
[Alias("Image")]
[String[]]$FullName,
[String]$Destination = $(Get-Location),
[Switch]$Overwrite,
[Int]$WidthPx,
[Int]$HeightPx,
[Int]$DPIWidth,
[Int]$DPIHeight,
[Switch]$FixedSize,
[Switch]$RemoveSource
)
Begin
{
[void][reflection.assembly]::LoadWithPartialName("System.Windows.Forms")
#[void][reflection.assembly]::loadfile( "C:\Windows\Microsoft.NET\Framework\v2.0.50727\System.Drawing.dll")
}
Process
{
Foreach($ImageFile in $FullName)
{
If(Test-Path $ImageFile)
{
$OldImage = new-object System.Drawing.Bitmap $ImageFile
$OldWidth = $OldImage.Width
$OldHeight = $OldImage.Height
if($WidthPx -eq $Null)
{
$WidthPx = $OldWidth
}
if($HeightPx -eq $Null)
{
$HeightPx = $OldHeight
}
if($FixedSize)
{
$NewWidth = $WidthPx
$NewHeight = $HeightPx
}
else
{
if($OldWidth -lt $OldHeight)
{
$NewWidth = $WidthPx
[int]$NewHeight = [Math]::Round(($NewWidth*$OldHeight)/$OldWidth)
if($NewHeight -gt $HeightPx)
{
$NewHeight = $HeightPx
[int]$NewWidth = [Math]::Round(($NewHeight*$OldWidth)/$OldHeight)
}
}
else
{
$NewHeight = $HeightPx
[int]$NewWidth = [Math]::Round(($NewHeight*$OldWidth)/$OldHeight)
if($NewWidth -gt $WidthPx)
{
$NewWidth = $WidthPx
[int]$NewHeight = [Math]::Round(($NewWidth*$OldHeight)/$OldWidth)
}
}
}
$ImageProperty = Get-ItemProperty $ImageFile
$SaveLocation = Join-Path -Path $Destination -ChildPath ($ImageProperty.Name)
If(!$Overwrite)
{
If(Test-Path $SaveLocation)
{
$Title = "A file already exists: $SaveLocation"
$ChoiceOverwrite = New-Object System.Management.Automation.Host.ChoiceDescription "&Overwrite"
$ChoiceCancel = New-Object System.Management.Automation.Host.ChoiceDescription "&Cancel"
$Options = [System.Management.Automation.Host.ChoiceDescription[]]($ChoiceCancel, $ChoiceOverwrite)
If(($host.ui.PromptForChoice($Title, $null, $Options, 1)) -eq 0)
{
Write-Verbose "Image '$ImageFile' exist in destination location – skiped"
Continue
} #End If ($host.ui.PromptForChoice($Title, $null, $Options, 1)) -eq 0
} #End If Test-Path $SaveLocation
} #End If !$Overwrite
$NewImage = new-object System.Drawing.Bitmap $NewWidth,$NewHeight
$Graphics = [System.Drawing.Graphics]::FromImage($NewImage)
$Graphics.InterpolationMode = [System.Drawing.Drawing2D.InterpolationMode]::HighQualityBicubic
$Graphics.DrawImage($OldImage, 0, 0, $NewWidth, $NewHeight)
$ImageFormat = $OldImage.RawFormat
$OldImage.Dispose()
if($DPIWidth -and $DPIHeight)
{
$NewImage.SetResolution($DPIWidth,$DPIHeight)
} #End If $DPIWidth -and $DPIHeight
$NewImage.Save($SaveLocation,$ImageFormat)
$NewImage.Dispose()
Write-Verbose "Image '$ImageFile' was resize from $($OldWidth)x$($OldHeight) to $($NewWidth)x$($NewHeight) and save in '$SaveLocation'"
If($RemoveSource)
{
Remove-Item $Image -Force
Write-Verbose "Image source '$ImageFile' was removed"
} #End If $RemoveSource
}
}
} #End Process
End{}
}
# Determine if local or domain account
$WhoAmI = whoami
$Prefix = $WhoAmI.split("{\}")[0]
If ($Prefix -eq (Hostname)){
$AccountType = "Local"
}
Else {
$AccountType = "Domain"
}
# Get sid and photo for current user
If ($AccountType -eq "Domain"){
$user = ([ADSISearcher]"(&(objectCategory=User)(SAMAccountName=$env:username))").FindOne().Properties
$user_photo = $user.thumbnailphoto
$user_sid = [System.Security.Principal.WindowsIdentity]::GetCurrent().User.Value
If ((Test-Null $user_photo) -eq $false) {
Write-Verbose "Photo exists in Active Directory."
}
# If no image was found in profile, use one from network share.
Else {
Write-Verbose "No photo found in Active Directory for $env:username, using the default image instead"
$user_photo = 'C:\Resources\Profile Pics\User.png'
}
}
Else{
$user = New-Object System.Security.Principal.NTAccount($env:username)
$user_sid = ($user.Translate([System.Security.Principal.SecurityIdentifier])).Value
$user_photo = 'C:\Resources\Profile Pics\User.png'
}
# Set up image sizes and base path
$image_sizes = @(32, 40, 48, 96, 192, 200, 240, 448)
$image_mask = "Image{0}.jpg"
$image_base = "C:\Users\Public\AccountPictures"
# Set up registry
$reg_base = "HKLM:\SOFTWARE\Microsoft\Windows\CurrentVersion\AccountPicture\Users\{0}"
$reg_key = [string]::format($reg_base, $user_sid)
$reg_value_mask = "Image{0}"
If ((Test-Path -Path $reg_key) -eq $false) { New-Item -Path $reg_key }
# Save images, set reg keys
Try {
ForEach ($size in $image_sizes) {
# Create hidden directory, if it doesn't exist
$dir = $image_base + "\" + $user_sid
If ((Test-Path -Path $dir) -eq $false) { $(mkdir $dir).Attributes = "Hidden" }
# Save photo to disk, overwrite existing files
$file_name = ([string]::format($image_mask, $size))
$path = $dir + "\" + $file_name
Write-Verbose " saving: $file_name"
If ($AccountType -eq "Domain"){
$user_photo | Set-Content -Path $path -Encoding Byte -Force
Get-ChildItem "$dir\$file_name" | Set-ImageSize -Destination $dir -WidthPx $size -HeightPx $size -Overwrite
}
Else {
Get-ChildItem 'C:\Resources\Profile Pics\User.png' | Set-ImageSize -Destination $dir -WidthPx $size -HeightPx $size
Rename-Item -Path "$dir\User.png" -NewName $file_name -Force
}
# Save the path in registry, overwrite existing entries
$name = [string]::format($reg_value_mask, $size)
$value = New-ItemProperty -Path $reg_key -Name $name -Value $path -Force
}
}
Catch {
Write-Error "Cannot update profile picture for $env:username."
Write-Error "Check prompt elevation and permissions to files/registry."
}
There is one ugly side effect: a CMD windows with taskeng.exe running will show after login. A number of users are disturbed by this and wonder if something bad is happening with their machine. So far I found no solution to hide this window.
Hi Maurice,
You could run it as a PowerShell Logon Script instead of setting up the Task Schedule. That would resolve the issue you mentioned.
Best regards,
Joakim
Perfect!
I configured this and looks that everything works (photos with different dimension are in proper folder, in registry is proper SID subkey with images entries and path) but i still can't see photo :(
Do you have any idea why ?
Hi Piotr,
Does the registry populate with the values to the files?
Best regards,
Joakim
Hi,
yes – under users i have SID subkey with 8 subkeys like Imagexxx with right path to photoes c:\users\Public\AccountPictures\__SID_number__\Imagexxx.jpg
Hi Piotr,
Which version of Windows are you running? On Windows 10, "C:\Users\Public\AccountPictures" is not the correct location, check "C:\ProgramData\AccountPictures" for the files.
Best regards
Thanks, works great!
The script works well but i have one issue. Images in AD is encoded in base64 format. How could i decode that and save in jpg. Can you help, guys?
Thanks to Sean Wheeler for his explanation of byte arrays here which helped me figure it out, along a couple other sources found on google:)
https://seanonit.wordpress.com/2014/11/11/understanding-byte-arrays-in-powershell/comment-page-1/#comment-151
#example decoding base64 AD Thumbnail
$path = ‘c:\temp\12345.jpg’
$user = get-aduser ‘12345’ -properties thumbnailphoto
$thumbnail = $user.thumbnailphoto
$Base64EncodedString = [System.Text.Encoding]::UTF8.GetString($thumbnail[0])
$Decodedbytes = [Convert]::FromBase64String($Base64EncodedString)
[IO.File]::WriteAllBytes($path, $Decodedbytes)
This work with windows 8.1 to?
Hi,
Yes, works with Windows 8 aswell. Make sure you're running the latest PowerShell version for full functionality.
Thanks.
work fine
Thank you for this! The script appears to work well, however the images within the AccountPictures directory are all the same size. They appear to be the dimensions of the image in AD. Does anyone know why this may be?
Hi,
This script is amazing but i wonder, is their a way you can show more then 1 pictures? So when you have as example user 1 and user 2 next too each other.
Greetz Rick
It works in Windows 8\8.1 but in Windows 7 there is problem with creating registry keys on user account.
Hi Michal,
Unfortunately I've not tried the script on Windows 7, might use different registry settings.
Best regards.
Hi,
The images are resized incorrectly, can that be fixed?
It doesn't look good.
Regards,
Hi!
I have loaded Jesse Paxson edited script and changed the paths to C:\ProgramData\AccountPictures.
Images are copied from the AD to C:\ProgramData\AccountPictures , but will not load into the start meny. Tried on both Win7 and Win10.
What could be wrong? Do I need to alter the script further?
Hi Knut,
same problem here. Image are copied correctly to C:\ProgramData\AccountPictures but will not appear as user picture. Still have the stock windows 10 symbol.
What is with hte path C:\ProgramData\Microsoft\User Account Pictures
Hi,
Thank you for your script, it was an awesome start, but the quality of the picture from the Active Directory is very bad.
I modified your script to get pictures from the Exchange (2013) Server. Pictures are 648px x 648px with 96DPI.
I hope it helps someones.
———————
[CmdletBinding(SupportsShouldProcess=$true)]Param()
function Test-Null($InputObject) { return !([bool]$InputObject) }
Add-Type -AssemblyName system.drawing
# all variables
#$user = ([ADSISearcher]"(&(objectCategory=User)(SAMAccountName=test_user))").FindOne().Properties
$user = ([ADSISearcher]"(&(objectCategory=User)(SAMAccountName=$env:username))").FindOne().Properties
$user_photo = $user.thumbnailphoto
$mail = $user.mail
$user_sid = [System.Security.Principal.WindowsIdentity]::GetCurrent().User.Value
# <modify your exchange server>
$exchange = "https://exchange.yourdomain.com"
$ews = "/ews/Exchange.asmx/s/GetUserPhoto?email="
$size = "&size=HR648x648"
# HR48x48 | HR64x64 | HR96X96 | HR120X120 | HR240X240 | HR360X360 | HR432X432 | HR504X504 | HR648X648
$url = $exchange + $ews + $mail + $size
# Set up image sizes and base path
$image_sizes = @(32, 40, 48, 96, 192, 200, 240, 448)
$image_mask = "Image{0}.jpg"
$image_base = "C:\ProgramData\AccountPictures"
# download
$output = $image_base + "\" + $user_sid + "\Image648.jpg"
$web = New-Object System.Net.WebClient
$web.UseDefaultCredentials = $True
$picture = ([string]::format($output))
# Create hidden directory, if it doesn't exist
$dir = $image_base + "\" + $user_sid
If ((Test-Path -Path $dir) -eq $false) { $(mkdir $dir).Attributes = "Hidden" }
# Continue if an image was returned
If ((Test-Null $user_photo) -eq $false) {
Write-Verbose "Photo exists in Active Directory, downloading from EWS"
#echo "picture = existing"
$download = $web.DownloadString($url) | Set-Content -path $output
}
# If no image was found in profile, use one from network share.
Else {
Write-Verbose "No photo found in Active Directory for $env:username, using the default image instead"
#echo "picture = not existing"
$default = Copy-Item "\\$env:USERDNSDOMAIN\NETLOGON\defaultuser.jpg" $output
}
# Set up registry
$reg_base = "HKLM:\SOFTWARE\Microsoft\Windows\CurrentVersion\AccountPicture\Users\{0}"
$reg_key = [string]::format($reg_base, $user_sid)
$reg_value_mask = "Image{0}"
If ((Test-Path -Path $reg_key) -eq $false) { New-Item -Path $reg_key }
# Save images, set reg keys
Try {
ForEach ($size in $image_sizes) {
# Save photo to disk, overwrite existing files
$filename = ([string]::format($image_mask, $size))
$path = $dir + "\" + $filename
Write-Verbose " saving: $filename"
# Resize pictures to image_sizes
$newimage = New-Object System.Drawing.Bitmap($size, $size)
$graph = [System.Drawing.Graphics]::FromImage($newimage)
$graph.DrawImage([System.Drawing.Image]::FromFile($picture), 0, 0, $size, $size)
$newimage.Save($path, [System.Drawing.Imaging.ImageFormat]::jpeg)
# Save the path in registry, overwrite existing entries
$name = [string]::format($reg_value_mask, $size)
$value = New-ItemProperty -Path $reg_key -Name $name -Value $path -Force
}
}
Catch {
Write-Error "Cannot update profile picture for $env:username."
Write-Error "Check prompt elevation and permissions to files/registry."
}
Hi Sebastien,
The way we described does not require on-prem Exchange. Since a lot of our customers are using Office 365 the Exchange attribute is not viable. However if you're using on-prem Exchange your approach is probably the better.
Quality of the picture depends on which quality you uploaded it. You can upload higher resolution pictures to AD using third party applications or scripts, which is what I would personally recommend.
Oh, I didn't understand the part that you can upload higher quality pictures to the Active Directory with third party applications. I thought the limit was on the AD itself. Thank you very much for the reply.
Have a great day.
I'm trying to use this with AD attribute EmployeeID because that is the label of the employee pictures. The pictures are located in a network share "\\server\share". What changes do I need to make to get this script to work. Everything I've tried hasn't worked.
Hi Jeff,
Just to clarify. Do you want to upload the network share pictures to Active Directory or use those network pictures to sync to local computers?
Is there a way to suppress the error message when your computer is connected to a network but not to the corporate network needed for the script to run?
Hi Joakim,
the script works great till I log off. Loggin off takes 10 minutes.
For troubleshooting I created a test OU where I linked only the 2 GPO for profilepicture, same problem.
Have you any wink for me?
I can't get it to work, and it seems to have to do with the executionpolicy. The only way I can get it to work is to set the executionpolicy to unrestricted, and then run the powershell as administrator.
Any idea what I'm doing wrong? I don't think it would be wise to change the execution policy to unrestricted on all our computers, right?
Hi,
The way I have it running currently is by skipping the Scheduled task and just running it in as a logon script. This does have some implications but doesn't seem to impact the performance for us.
By doing so you can execute it to only run that script with the parameter -Executionpolicy Bypass
Hi Joakim
Thanks – Might be a stupid question, but are you running the VBS script in the logon? – because I can't seem to find another way to add -executionpolicy bypass?
or is there something I'm missing?
Hi Joakim
How do you run a powershell from the logon script with the -Executionpolicy Bypass parameter? I don't seem to be able to find a way to do it?
– Alex
I figured it out. Thanks.
I used the VBS script as the login script
Thanks very much for this script and some of the user additions. We have it working but for some reason the image appears squashed in the start menu and lock screen, so all users look short and fat. The images look fine in the account folder so unless the ratio is wrong I can't see why this would happen.
Can anyone advise on a fix please?