I finally I got some time to play with the new Azure Active Directory Sync tool and its configuration. You can read more about the new features on this Technet-blog.
Installation
The installation was very straight forward. The step-by-step instruction are provided in the http://msdn.microsoft.com/en-us/library/azure/dn757602.aspx article. The administration tools and scripts are located in difference places compared to DirSync which was little confusing in the beginning.
Synchronization Service Manager
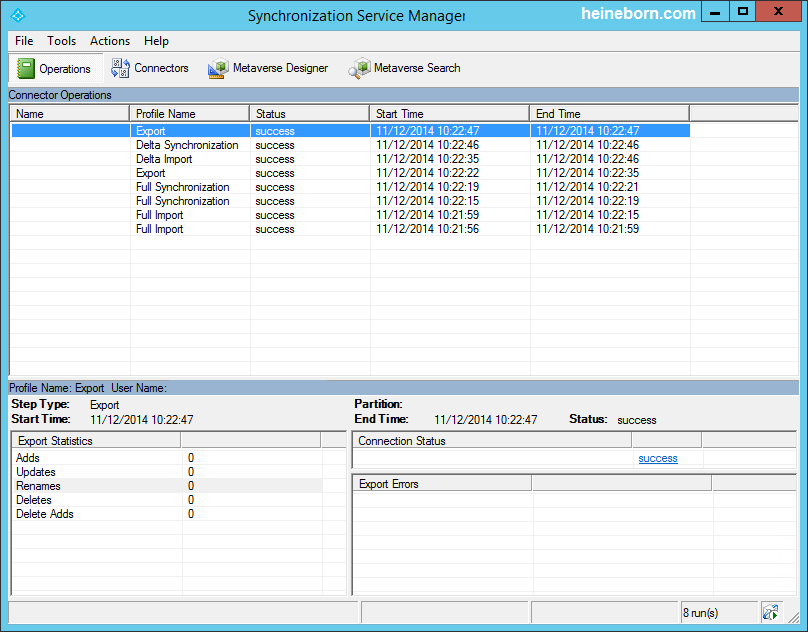
This is where you administer or customize your synchronization options. It is an MIIS client. In the backend it creates Management Agent (MA) for your directory and Azure.
The default location of this file (missclient.exe) is in C:\Program Files\Microsoft Azure AD Sync\UIShell
Schedule
In DirSync the amount of time between synchronizations was determined by the Microsoft.Online.DirSync.Scheduler.exe.config file.
As previously mentioned this changed with the release of Azure Active Directory (AAD) Sync.
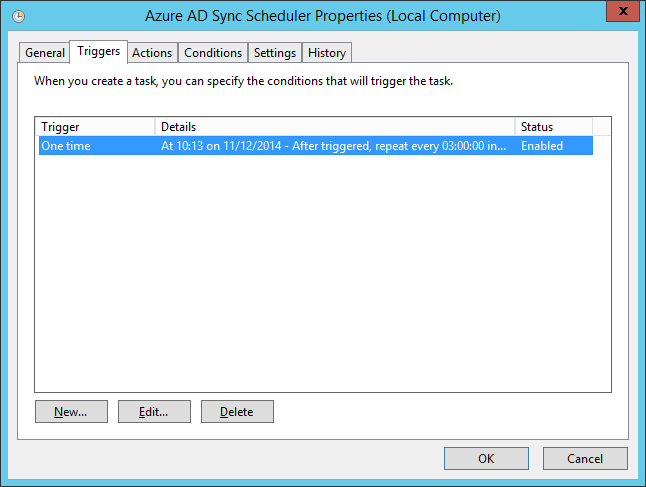
By default, the Azure AD sync schedule runs every 3 hours. It is executed by a Scheduled task as shown here:

You can manually force the replication from here if needed. In the backend it calls the DirectorySycnClientCmd.exe file which is located in C:\Program Files\Microsoft Azure AD Sync\Bin\ folder.
You can change the frequency by going to the Properties:
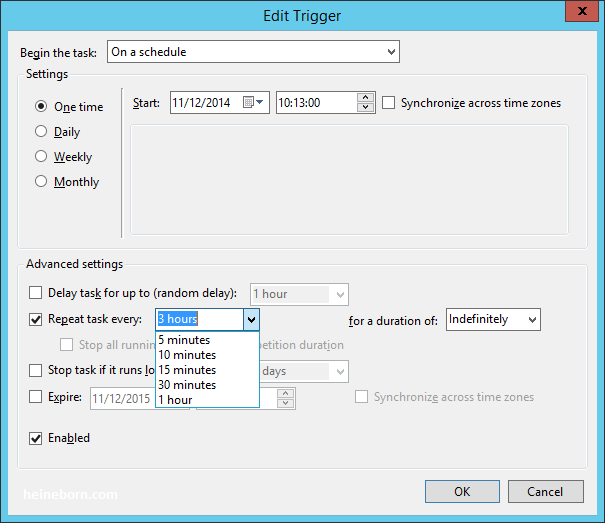
Note: If you have Office 365 in a hybrid mode, changing the default schedule or creating a custom schedule is not recommended or supported.
When you save the changes the Task Scheduler will ask you for a password for the “AAD_xxxxxxxx” account.
At this point it is safe to reset that users password (we recommend a strong password).
Troubleshooting Password Sync
If the job seems to work, but changes are not read and pushed to Azure properly, do the following to verify local permissions.
1. In Active Directory Users and Computers, right-click the domain, and then click Delegate Control.
2. On the Users or Groups page, click Add. This has to be the service account you use to configure the Azure AD Sync at the first place.
3. On the Tasks to Delegate page, select create a custom task to delegate, and then click Next.
4. On the Active Directory Object Type page, select this folder, existing objects in this folder, and creation of new objects in this folder, and then click next.
5. On the Permissions page, in the Permissions box, select “Replicating Directory Changes” & “Replicating Directory Changes All” and then click Next.
6. Click Finish.
7. Reboot the AAD Sync server and everything should be ok.
After changing the schedule. you will be prompted to enter the password for some mysterious microsoft-generated account, which you will not know.
Exact thing happened to me…
I would say a common user account which has permissions to execute that task (respectively the AD Sync file) would be sufficient.
Hi,
I'm sure you can reset the password, since the only thing this account does it run this task.
You do not however NEED to use the built-in account. I changed to a service account instead. Just make sure the new account belongs to the same Security Groups as the built-in account.
Best regards,
Joakim
Even if it is possible to manually change the password or to use a different service account, is this change supported by Microsoft?
Hi Joacim,
I've spoken to the Microsoft Office 365 department and it is safe to change the password as long as you update the credentials in the Task Scheduler aswell.
They recommend that you do run the built-in account for the Task.
Best regards,
Joakim
Same thing for me! Which is that password?
Thank you!
If you change the password for the AAD_* service account to make the change on the Scheduled Task, you must also change the logon information for the Microsoft Azure AD Sync service, if you are doing password sync.
Was there really a need to publish a guide for an outdated tool? Azure AD Connect is replacing all old versions in the relatively near future…
For some reason I dont see this task and it is running just fine on my system